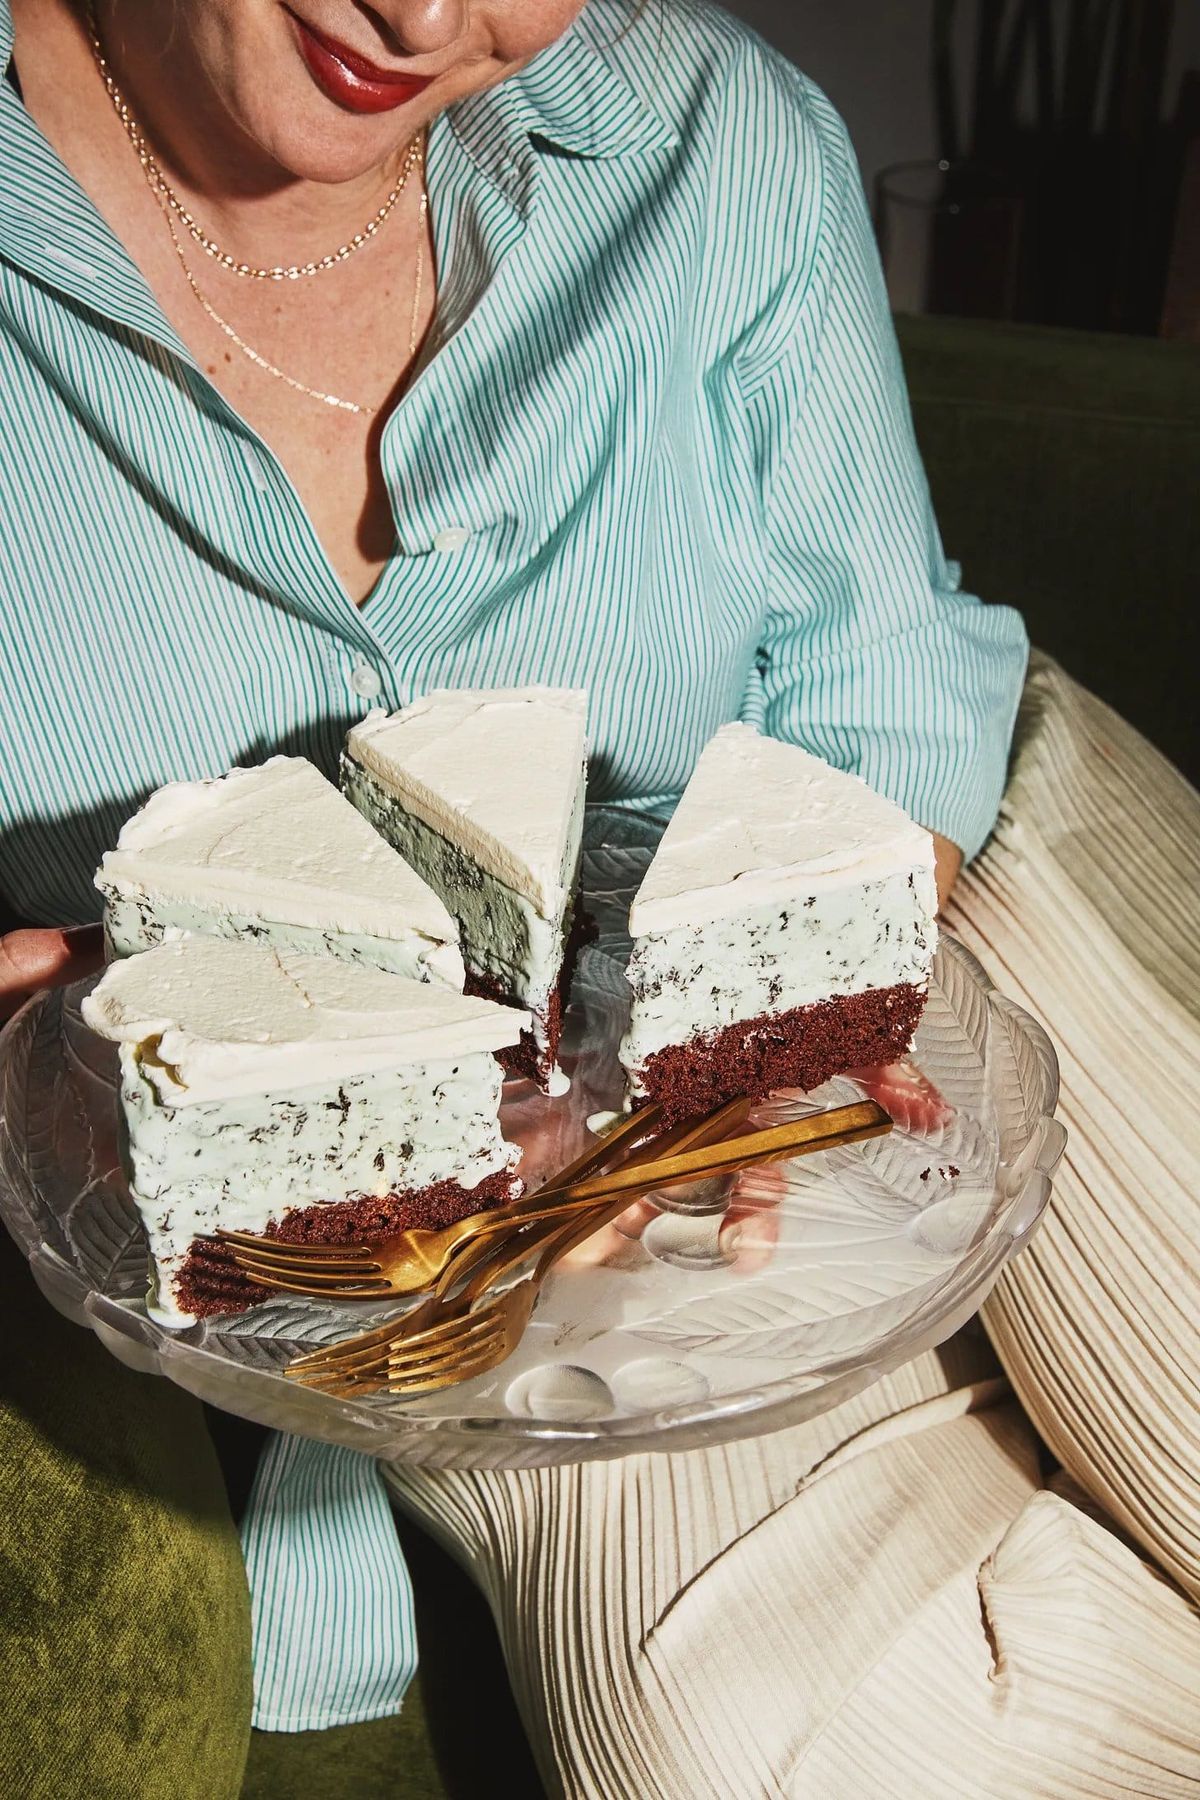
Mint Chip Ice Cream Cake
This ice cream cake is nostalgic, delightful, and what everyone wants for their birthday.
YIELD — one tall 9-inch cake
Ice cream cake, as the name implies, is ice cream, shaped and frosted like a cake. Ideally, there is also actual cake or some sort of cookie crust, to prevent leaking and give your ice cream something to melt into. And you can (and should) frost it with sweetened whipped cream (rather than buttercream, which isn’t all that delicious once frozen).
While technically “any ice cream can be made into an ice cream cake,” I wouldn’t know because aside from regular vanilla, mint and chip is the only ice cream I eat. Thrifty’s made the best until they got bought by Rite Aid and now they don’t sell ice cream like they used to. Now, my preferred brand is Baskin-Robbins (I’m a legacy brand girl, what can I say). The reason isn’t because they use the highest-quality dairy and most fair trade chocolate—I’m not sure they do!–it’s because it’s not too sweet, the chocolate is in flecked form, not chunk- or hunk-size, and the ratio of chocolate to ice cream is extremely good. And sue me, I like the fake mint flavor. Fresh mint leaves steeped in hot dairy will never, ever give you something that tastes as good as mint extract or artificial mint flavor. I hate to say it, you hate to read it, we all know it’s true.
Ingredients
- 9-inch disc of chocolate cake (you can cut this out of the All-Purpose Chocolate Sheet Cake)
- 2 quarts mint chip ice cream (or whatever flavor you like!)
- 2 cups/460g heavy cream
- ¼ cup/30g powdered sugar
- Pinch of salt
Preparation
- Line a 9-inch springform pan with plastic wrap, making sure there’s some plastic wrap hanging over the edges. Place the cake round on the bottom.
- Let the ice cream soften on your counter for 10 minutes or so—you want the texture to be slightly softer than simply “scoopable” but decidedly not “melted.” Spoon the ice cream out onto the cake and place a piece of plastic wrap directly on top. Use your palms to smush the ice cream down, making sure it’s in one even layer. (You could use a spoon, but using your hands is faster and honestly more fun.) Place it in the freezer while you make the whipped cream.
- In a large bowl with a whisk, an electric hand mixer, or whatever you want, beat the heavy cream to medium peaks, then whisk in the powdered sugar. It might feel a touch sweeter than your average whipped cream, but that’s because it’s getting frozen, which dulls flavors, including sweetness. Beat until you’ve got nice, pillowy stiff peaks and whisk in a nice pinch of salt, for seasoning.
- Remove the cake from the freezer and peel back the plastic wrap. Still inside the springform, spoon about 1 cup of the whipped cream on top of the ice cream and “frost” the top of the cake, just to create a nice even layer of whipped cream, then pop it back into the freezer for at least 2 hours. Keep the rest of the whipped cream refrigerated.
- When you’re ready to serve, carefully unmold the ice cream cake—if it still feels a little too mushy/malleable for your liking, pop it back into the freezer until it feels solid enough to exist without its frame.
- Once the cake is frozen and ready, remove the springform sides and frost the outside and the top with the remaining whipped cream. This can be put back into the freezer, if you like, or sliced and served as is. I find larger, fatter slices to be more dramatic, but they are perhaps too much for one person, so feel free to encourage sharing.
DO AHEAD: The quintessential do-ahead, ice cream cake can be assembled 1 week ahead, tightly wrapped in plastic, and frozen.


Discussion